Free Second Life
Shirts!
Download tons of Shirt Templates and Designs for Secondlife
Free Second Life
Shirts!
Download tons of Shirt Templates and Designs for Secondlife
Home
Links
Contact Me
Terms of Use
How to Use
Shirt Categories:
Offensive Shirts
Army
Shirts
Adult Humor
Shirts
Novelty Shirts
Sports Shirts
Movie Shirts
Tie Dye Shirts
Music Shirts
Alcoholic Shirts
People Shirts
Dress Shirts
Second Life Jackets
Second Life Pants
Womens Clothing

*WE HIGHLY RECOMMEND!
Second Life Tutorials
How to create an outfit for second life using a digital camera, photoshop, and your own clothing.
This Tutorial is a little more advanced, what we will be doing is using your own clothes, and turning them into second life clothing. This really isn't a whole lot different from just making a t shirt, but we will need a different template, there are many sites out there with advanced second life clothing templates, I prefer to use Robin Wood's templates which are available here. You can also download the free templates that second life provides from the second life website here.
For this tutorial I will be using Adobe Photoshop CS2 and Robin Wood's upper and lower body template. A few more items you might need would be either a white or solid color wall to hang clothing against, or a big piece of white construction board. This is so that we can easily get rid of the background later. I also like to use a few thumbtacks to spread the clothing out on the wall or background.
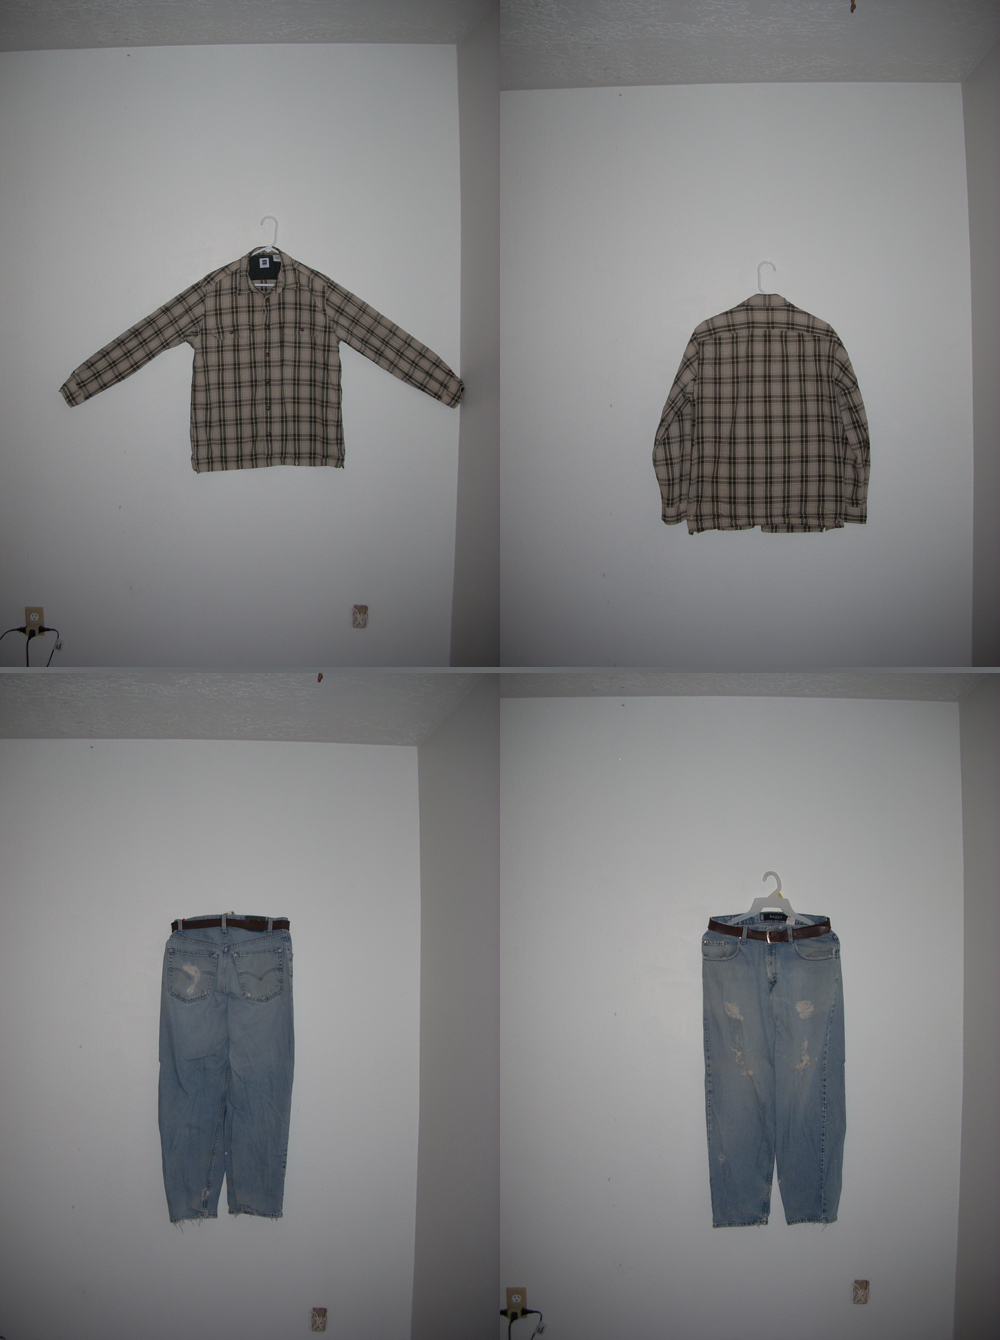 |
Ok the first thing that we are going to do is get our clothing setup on our background, and take pictures of whatever you want to make. In this case it will be a button up shirt and an old pair of jeans. I prefer to take 2 seperate pictures of the objects so that I can work with them both seperately. Here is what my setup looks like. Notice that I put a belt on the pants, this will add to the effect once it is on your avatar. You could also leave the shirt unbuttoned if you want, but I prefer to button them up. After you have all of your pictures, and make sure to take front and back as you can see, load the pictures and the upper body template in photoshop. I usually minimize the ones that I am not working on in order to avoid confusion, and keep the screen clear.
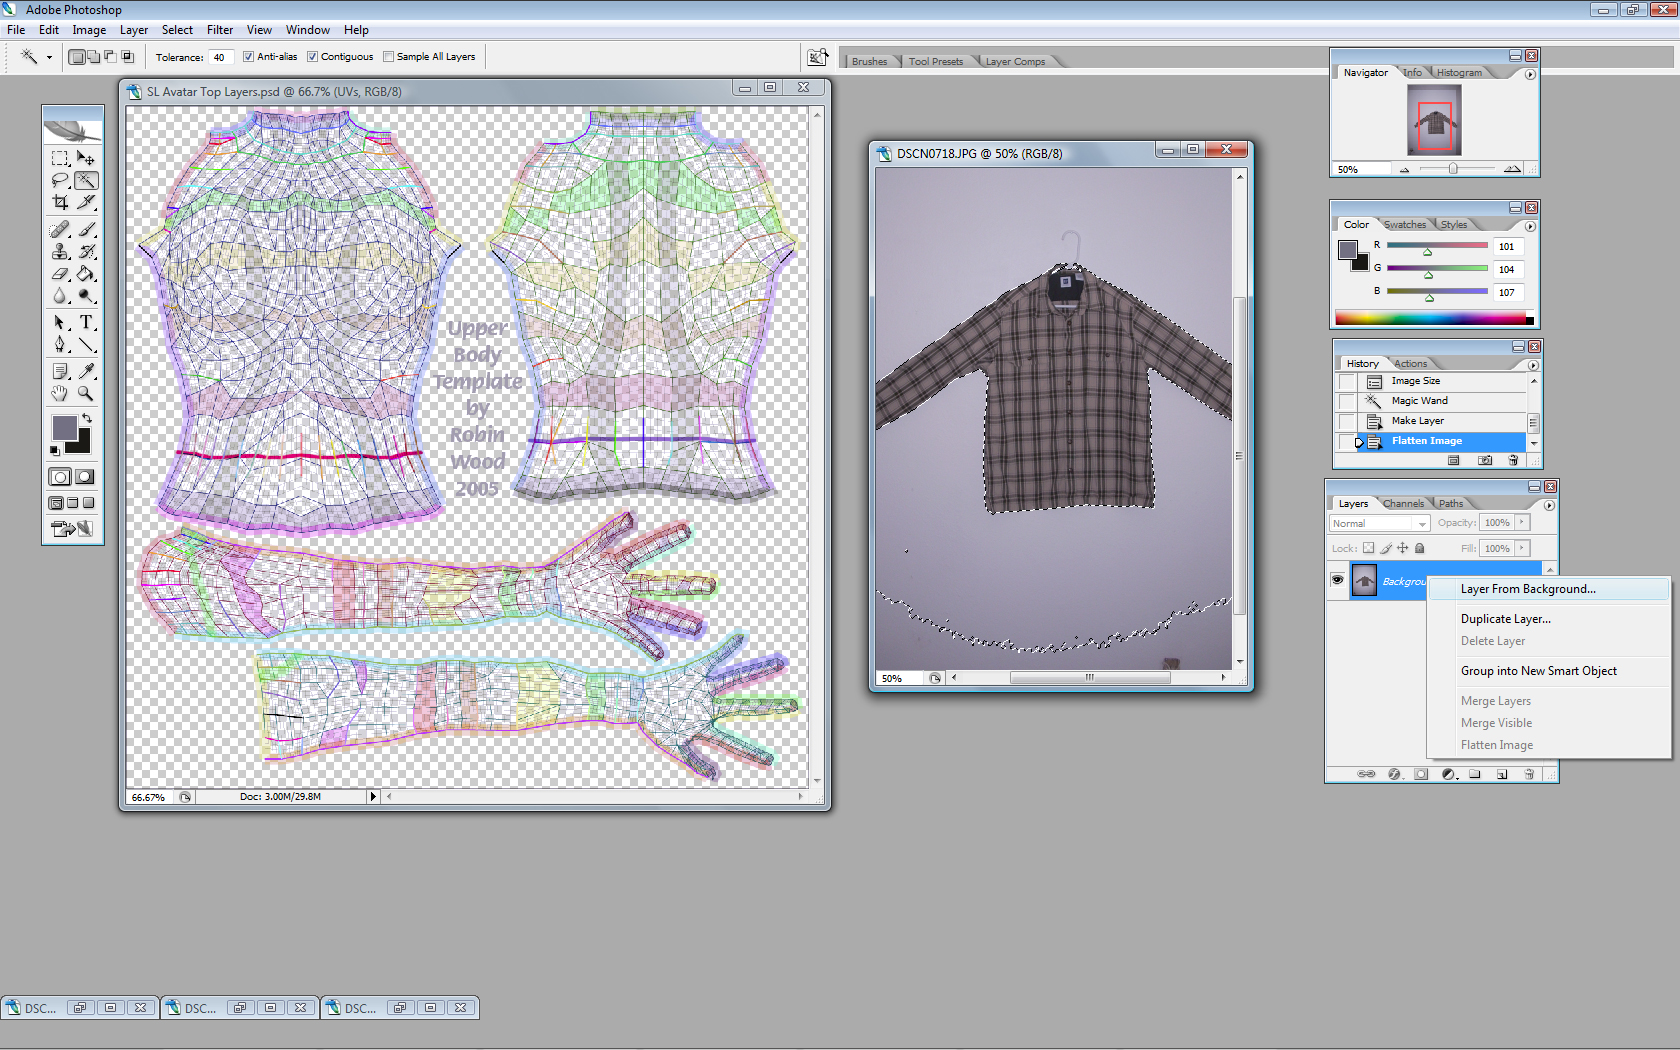 |
Now your digital camera probably takes pictures a very high resolution, meaning the images are gonna be huge! First thing you need to do is reduce the image size. Do this by going to Image > Image Size.... on the toolbar. Change the width to something like 1100 pixels and if you took the picture sideways like I did your height should be around 1467 pixels after you change the width. Ok now that we have the shirt down to size we need to remove the stuff we don't need. Select the magic wand tool on the side bar and depending on what type of background you used you may need to adjust the tolorance. I have mine set to 40. Then select the white area around the shirt. Next we need to select the backround layer in the right corner and right click. Then select layer from background.
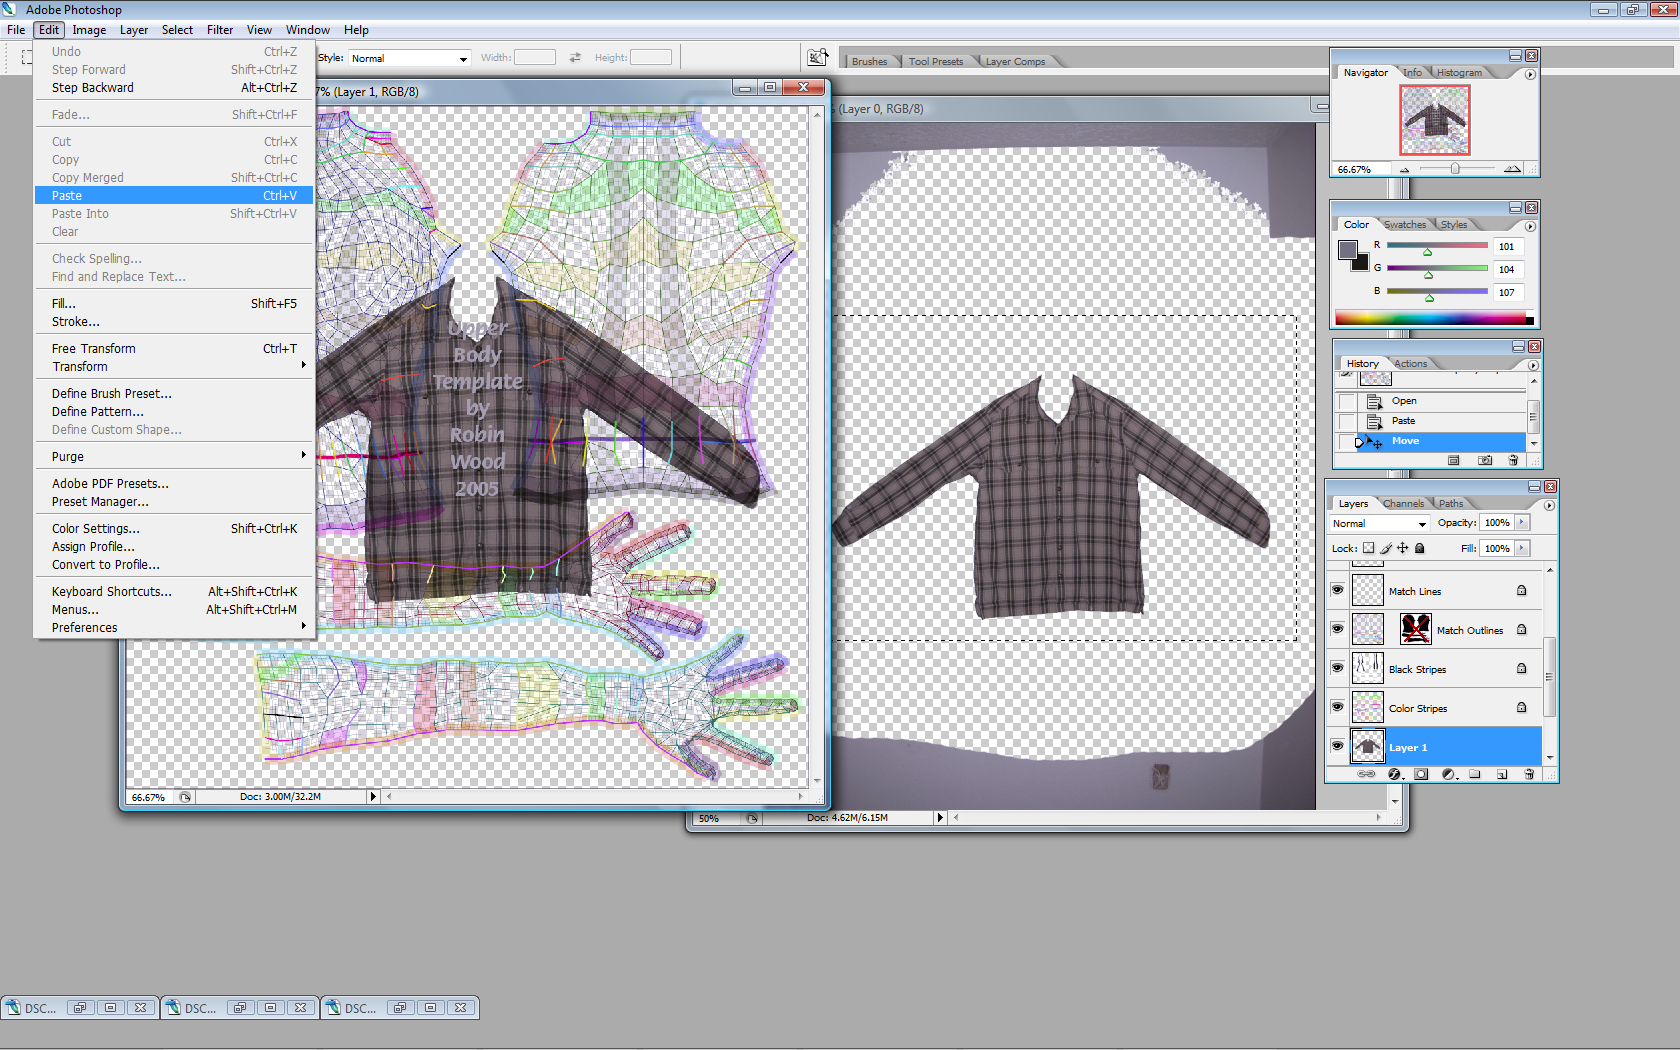 |
This should turn the background into a layer, so now you need to delete the extra background behind the shirt. It should still be highlighted, if not hit it again with your magic wand. Just press delete and most of the background should go away. You may have to take your eraser and manually erase some small areas, but you can get the majority of it with the magic wand tool. Once you have enough of the background deleted you need to select the rectangle marquee tool and select the shirt image. Once it is seleced copy the image and paste it onto your template.
 |
Now this is where it gets kinda of tricky. You need to select the shirt again using the rectangle tool. Select free transform and it lets you adjust the shape of the image. stretch and move the image the best you can to get it to fit the template. After you have it where you want it. You need to select the sleeve portion of the image so that we can make our sleeves. Select it with the rectangle tool and then copy and paste the image. Select the new image of the sleeve and go to free transform we need to rotate it and stretch it to fit the arm templates. This needs to be done for both arms. Also you will probably need to delete a section at the end of the image so that you will have a straight sleeve. If there are spots on the template not quite covered by the shirt fill them in with the clone stamp tool. Just hold down alt to select the area on the image you want to copy and then paint in the area that is still showing. Everything except for the neck area, we will erase this area later. Hopefully your screen looks something like the one above, if not mess around with it for a while, it really isn't that hard.
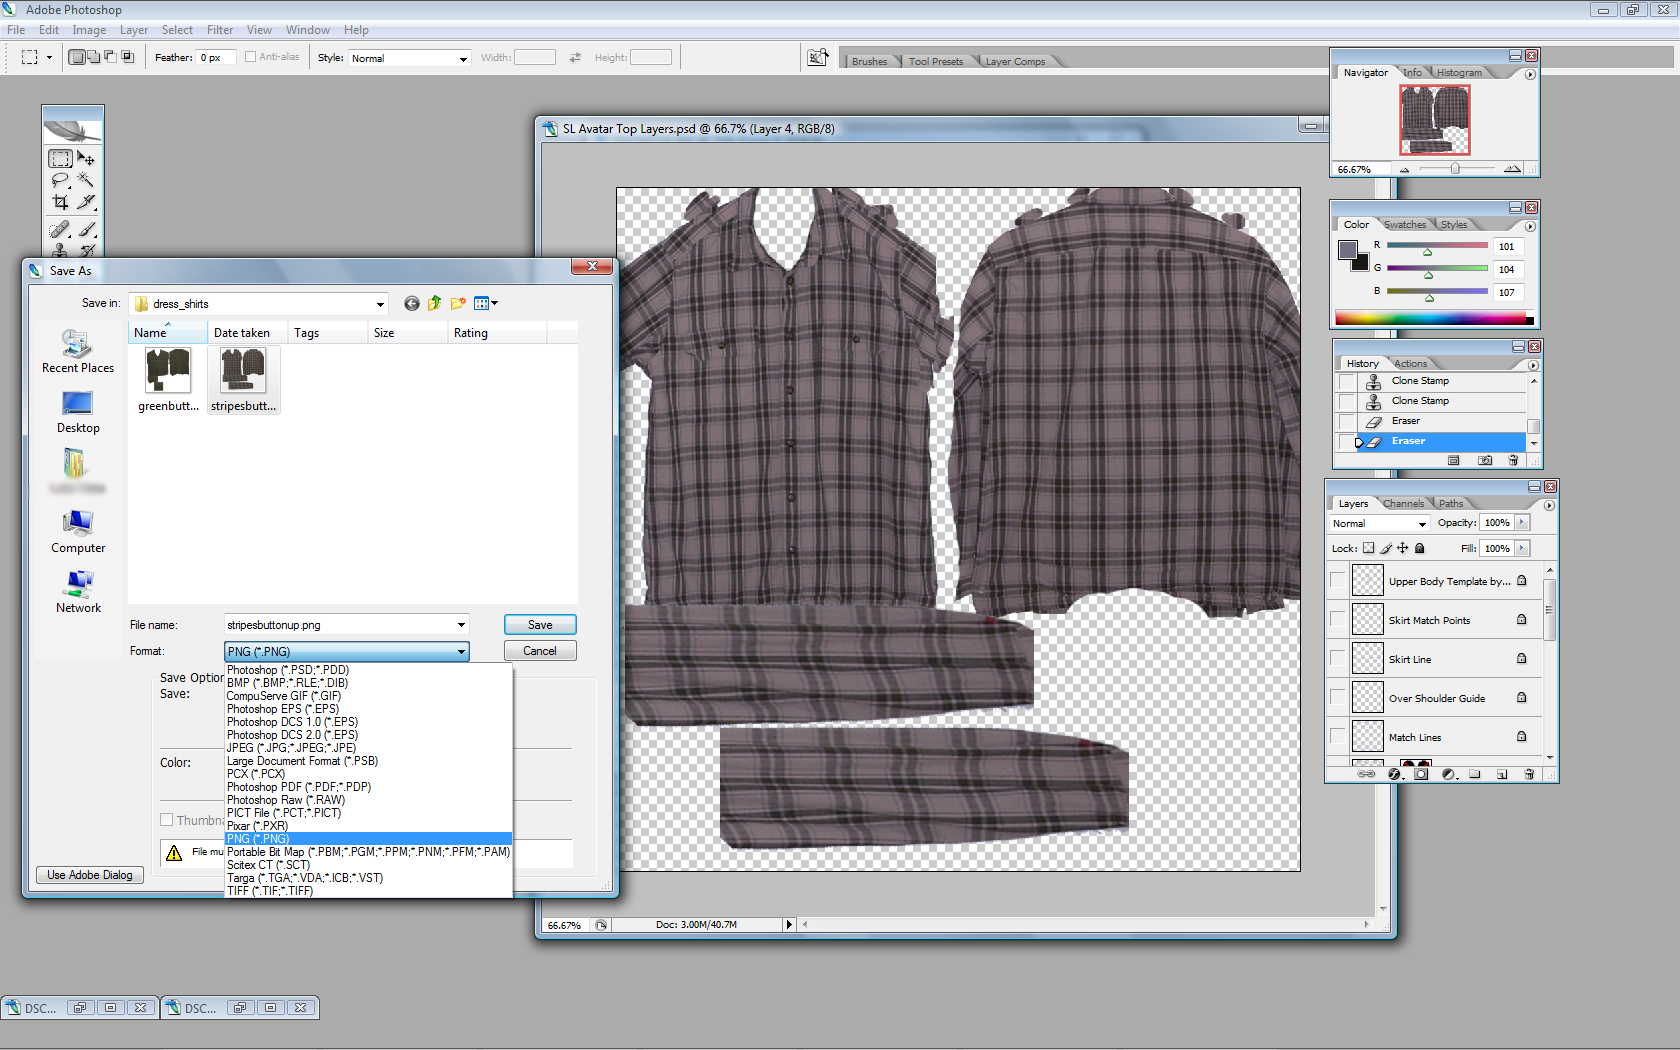 |
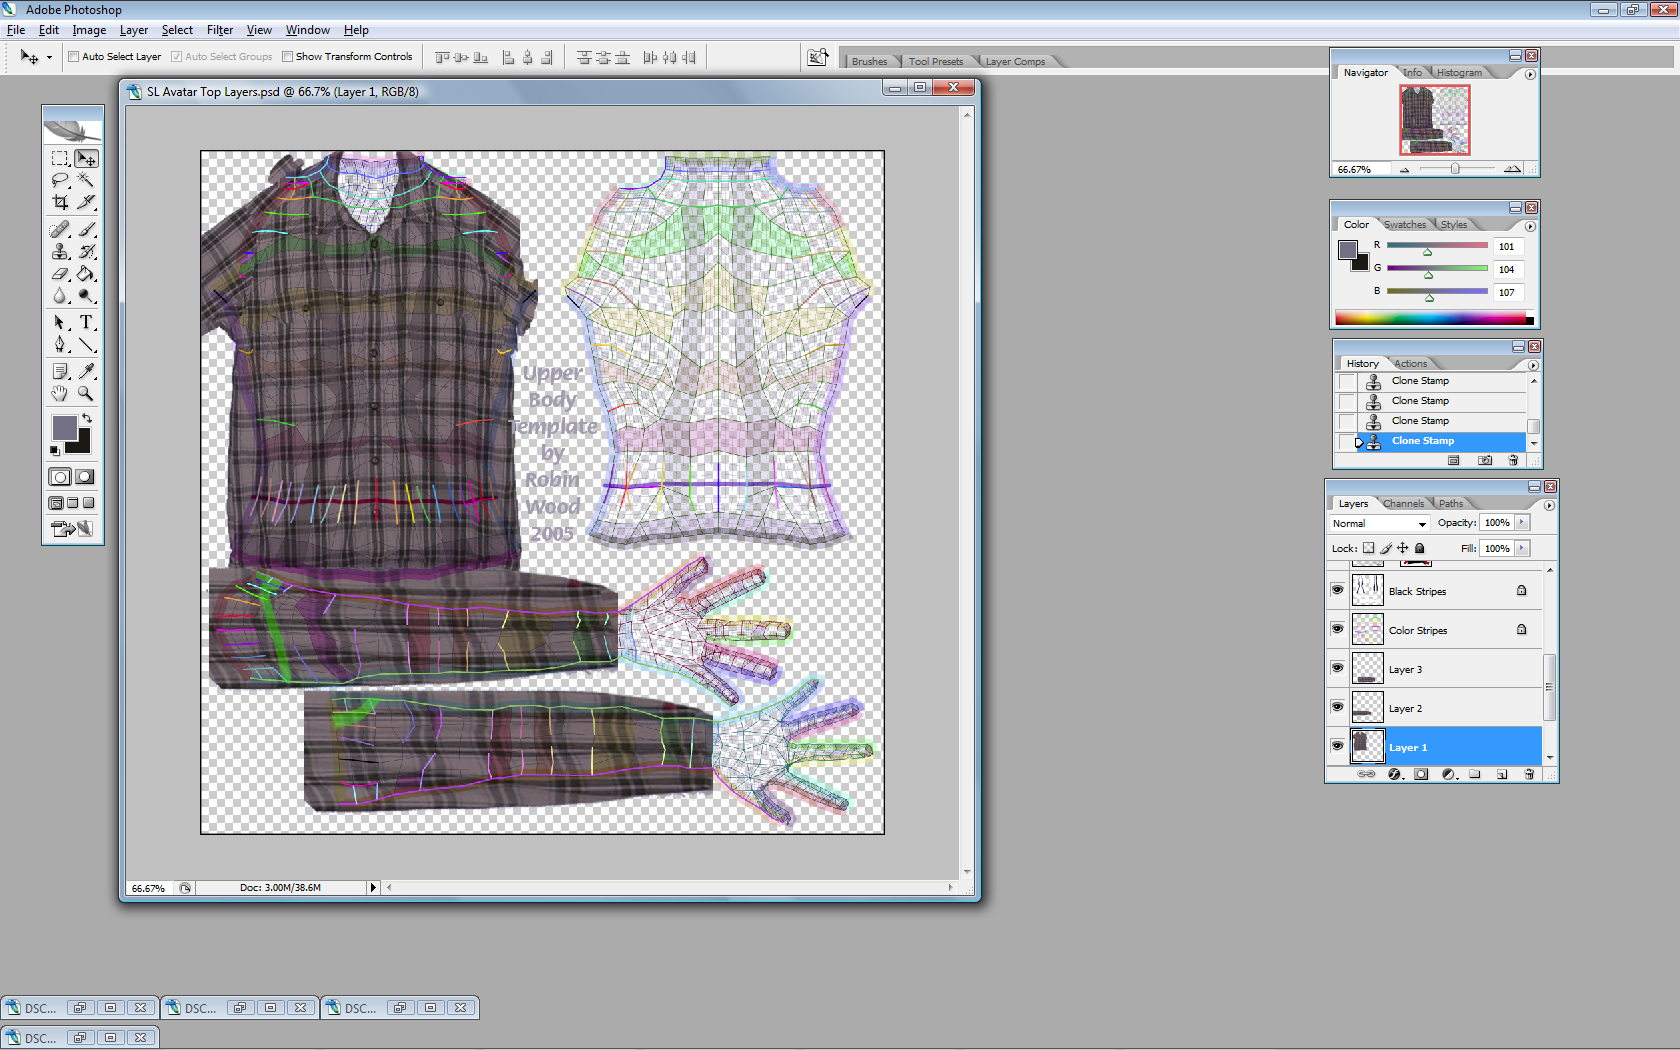
Ok now that you got the hang of stretching images and using the clone stamp tool it's time to do everything you just did except with back of the shirt. The back usually goes quicker. Once you have your image in place, you need to erase any part that is in the other template areas like the hands. Now we need to remove all the layers except for the shirt ones. Do this by selecting the "eye" image on the appropriate layers. After all the template layers are gone make sure you are ready to save the file. Make sure to save it as a .png file.
If you have any requests or pictures you would like turned into a free shirt please email me. I would be happy to fill requests in any catagory.